Adobe Premiere
When we use the term
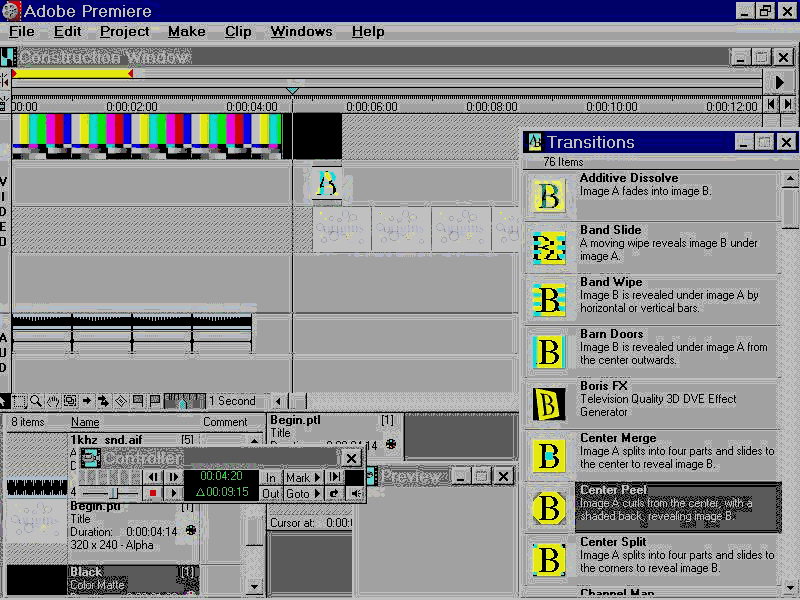
NLE, we mean editing video from your hard drive. NLE requires two things: editing software and a video capture card to get the video into your computer. Once the video clips are digitized and on your hard drive they can be assembled in any order, with the drag of a mouse, much like moving around sentences in a word processing program.Non Linear Editing software is timeline based. You start by selecting the in and out points of your scene. Remember, that since everything is digital, we can get frame accurate edit points every time! Each scene is then placed on the timeline. You can lay down more than one track of video and audio onto your timeline. Next you select and arrange all of your video scenes. You can move scenes and clips around in your video just by dragging them with your mouse. It really is that easy!
The strong suite of NLE are the effects. Since the video is in digital form, we don't have to worry about time base correctors and frame synchronizers. Effects are only limited by our own imagination and the software we choose to use. We can add special filters to clean up and restore picture quality, or to place ripples or swirls in the video. We can create complex transitions between scenes such as page turns, flips, roll ups, and breakaways, plus the standard dissolves and wipes.
When it comes to titling and graphics, NLE is extremely versatile. You can use any Windows true type font, so foreign languages are no problem at all. To add a logo or computer graphic you designed in to your video is a simple operation. In fact, we can make it fly, bounce, or spin onto the video. Of course all our titles and graphics can be superimposed and mixed with our video.
You can also add software plug-ins to your NLE software to create additional 3D transitions and effects. You can morph and do complex composting, masking and incorporate 3D models and animations. You can even add multiple titles, filters and effects onto the same scene. The power of NLE is truly incredible.
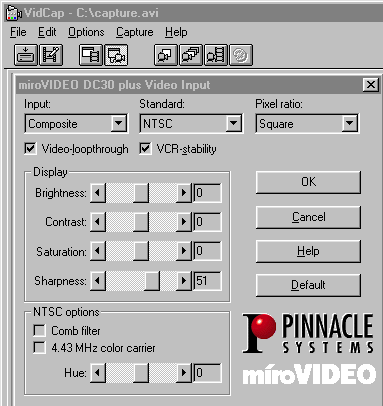
Video capture cards use various compression methods, called CODECs (Compression/ DECompression), to digitize and compress the video onto your hard drive. It is very important that you select the correct compression method to support your final video production. In today's world of digital videography it is important to realize that there are many more formats than videotape to deliver your content.
If you want to edit video and go back out to videotape, MJPEG (motion JPEG) is currently the most popular, technology available. Most cards use MJPEG. MJPEG is intended for creating high quality non-linear editing with output back to tape. It is considered a "lossy" CODEC, so the higher the compression, the smaller the file size, and the lower the video quality. 640x480 is considered to be full screen capture. This results in the best quality video. MJPEG cards often support 1/2 or 1/4 screen capture as well. These formats are good for multimedia or VHS editing because you get more video per gig. The downside of these smaller capture sizes is that the card ends up having to recreate the missing info so you can end up with artifacts and blurred colors.
The big decision you have to make with MJPEG is the size/compression/quality trade off. Generally we consider SVHS quality to be full screen (640 x 480) capture, 30 frames per second, both fields at compression ratios lower then 7:1. At this rate you will get a little over 5 minutes of video (with stereo audio) per gig. Video at this quality requires hard drives that can sustain data throughput over 3.5 megs per second.
See MJPEG Compression Chart below.
MPEG is the ideal choice for creating multimedia or web based video. Unlike MJPEG, MPEG is designed to pack a large amount of good quality video into a small file. It is a low loss compression method. Best of all, today's multimedia Pentium can play back beautiful full screen, full motion video on your computer monitor. Current versions of Win95 include an MPEG player.
This is the latest to hit video. The IEEE1394 standard allows super high-speed data transfers. The first generation of FireWire cards is now shipping. The CODEC used is very similar to MJPEG, with less loss. It is roughly equal to 5:1 compression or a data rate of 3.7 megs/sec. FireWire video is not scaleable (You can't lower the resolution), so you must have a really fast computer with top notch storage and sustained throughput of over 7 megs per second. Some predict that FireWire/DV camcorder and capture cards will replace the professional equipment used today by commercial video studios and the networks.
While the video capture card determines the actual video quality of your project, it is the sustained throughput of your video storage that determines whether you drop frames or get perfect playback. If you set your capture card at a higher data rate than your storage can handle, you will drop frames during capture and/or get jittery playback. A dedicated disk drive is recommended for your video clips. If you must use your system drive, make sure you create a separate partition for your video files. The longer the video, the more important your choice of video storage becomes. You may be able to get very good results for a minute or two, but longer video (over 5 min) requires a dedicated storage solution.
This does not mean that you must invest now in super fast storage. Just be prepared that you may have to live with lower video quality until you can get the kind of storage your capture card craves. The good news for digital videographers is that hard drives keep getting faster and cheaper. SCSI prices have fallen dramatically and new EIDE RAID systems are an excellent choice for hi-resolution home digital videography.
A very important issue you need to know about NLE and video storage is the 2GB file limitation in Video for Windows. This means that you can't create an avi file over 2GB in size. Even though new versions of Windows let you create partitions that are 100s of GB in size, the 2GB avi file limit remains. Note: New rendering technology and playback utilities have made it possible to work around this limitation.
Before your edited video can be played back to tape, the computer must "render" or "make" the finished movie as a single continuous .avi file. Once this new file is created, you can play it back anytime you like with the click of a mouse. One of the most misunderstood aspects of NLE is rendering. First, as the description implies, you will need to have enough disk space to create your finished movie. Second, the rendering process takes up a lot of computer power and time. The more titles, effects and filters you use the more processing power, speed and time will be needed to create the finished video. This is the area where more RAM and a faster processor can really make a difference. A P200MMX with 64 megs RAM as a minimum system. The latest NLE software is optimized for MMX and the additional RAM can make a huge difference in render times.
An issue to contend with in the prosumer nonlinear market is the 2 gigabyte file size limitation for .AVI files, the file type used for nearly all PC environments. With this restriction at the present time any one clip can only consume 2 gigabytes of space therefore the duration of that file depends on the compression level it is recorded at.
A new technology has been implemented by several of the leading hardware/software vendors. This new technology allows you to play video directly from the project timeline. All transitions and effects are rendered into temp files and then the entire video is played out to tape.
Since a second AVI file is not created, you save a lot of disk space. In addition, if you render out previews of the transitions/effects, they are remembered by the software and do not have to be re-rendered. This decreases the time required to create the new video dramatically. The other key benefit of this technology is that it gets around the 2GB file limitation of Video for Windows. This makes it possible to create non-linear edited video up to and over an hour in length (assuming you have the storage).
NOTE: While MJPEG is excellent for delivering fantastic video quality out to tape, it is a poor choice for multimedia. MJPEG is hardware compression, so the video files created using it can only be played back in computers with the MJPEG hardware installed. You can convert your MJPEG files into other CODECs using your video editing software, but this can take a long time and result in significant video quality loss.
Compression levels determine the file size per given time measurement, commonly measured in minutes per gig (gigabyte) and as mentioned above, compression level or data rate determines the detail / quality level of the processed video.
These are rough estimates of the "perceived" video quality per given MJPEG compression level:
Compression ratios, data rates and minutes per gig at various video quality levels. |
||||||
|
Video Quality |
compression |
data rate |
Storage min/gig |
|||
|
Multimedia |
12:1 |
1.5 |
11 |
|||
|
Home VHS |
9:1 |
2 |
8 |
|||
|
"Consumer Sweet Spot" |
7:1 |
2.5 |
6.5 |
|||
|
SVHS Prosumer |
6:1 |
3 |
5.5 |
|||
|
DV/FireWire |
5:1 |
3.6 |
4.5 |
|||
|
Professional SVHS |
4:1 |
4.5 |
3.5 |
|||
|
BetaCam |
3:1 |
6 |
2.5 |
|||
These values are subjective. There are additional factors determining video quality such as the nature of the source material i.e. the format and equipment it was acquired with. Generally video signals should be measured with the proper test equipment for signal quality and integrity. Additionally, DV/Firewire 5:1 and MJPEG 5:1 are not necessarily the same.
|
|
|
|
Portions
Copyright 1995,96,97,98 TEM Trading Corp. Reproduction of articles for educational/non commercial use is encouraged. Any use of our content or graphics for commercial use must be approved by The Electronic Mailbox. http://videoguys.com

